Web3Modal
The Web3Modal lets you easily add the wallets to your DApp. It provides a simple and intuitive interface for DApps to request actions on the blockchain, such as signing transactions and interacting with smart contracts.
Add Aurora Pass
You can add Aurora Pass as a recommended wallet to your Web3Modal by using the corresponding configuration option:
- For Web3Modal v3, use the
includeWalletIdsoption. More info can be found here. - For Web3Modal v2, use the
explorerRecommendedWalletIdsoption. About it, please read here. - Copy and paste the Wallet ID of the Aurora Pass wallet to your Web3Modal option. You can find it here or copy it directly:
76260019aec5a3c44dd2421bf78e80f71a6c090d932c413a287193ed79450694
You can find an example of adding the Aurora Pass Wallet ID in the integration example below.
Integrate Web3Modal
In this section, we will go through the development of a simple Web3Modal example to use Aurora Pass in a DApp.
We will use Wagmi and React as a base for our DApp. You can take a look at the Web3Modal Docs to learn more about other variants.
Create a simple React app
To start, let's create a React application by using create-react-app. Of course, you can use your existing codebase instead. We're doing this just for demonstration purposes.
You will need to run in your terminal:
npx create-react-app aurora-pass-example
cd aurora-pass-example
npm start
Your React app will be running now at http://localhost:3000. Just open that link in your browser to see the UI.
You can read more about the create-react-app here for more details.
Add Aurora Promo Widget
We are discussing the Promo Widget in detail in this article, please look at the code section here and add the Promo Widget popup to your DApp. The main goal of having is to allow users to install the Aurora Pass app in the easiest possible way. After this, we can continue with adding Web3Modal to the project.
Add Web3Modal
We will closely follow the Web3Model Wagmi v2 documentation here.
Import libraries and get projectId
First, let's add some new packages to the project:
npm install @web3modal/[email protected] wagmi viem @tanstack/react-query
Now, sign up at WalletConnect Cloud to get a WalletConnect projectId. You will get some random string like 4aee871f7a80f1ff5c7892226bd3ascd.
Add Web3Modal component
Now, let's create a file with a Web3Modal component:
import { createWeb3Modal, defaultWagmiConfig } from '@web3modal/wagmi/react'
import { WagmiProvider } from 'wagmi'
import { aurora, mainnet } from 'wagmi/chains'
import { QueryClient, QueryClientProvider } from '@tanstack/react-query'

// Setup queryClient
const queryClient = new QueryClient()

// Get projectId at https://cloud.walletconnect.com
const projectId = 'YOUR_PROJECT_ID_GOES_HERE';

// Create wagmiConfig
const metadata = {
  name: 'Web3Modal',
  description: 'Web3Modal Example',
  url: 'https://web3modal.com',
  icons: ['https://avatars.githubusercontent.com/u/37784886']
}

const chains = [mainnet, aurora]

const wagmiConfig = defaultWagmiConfig({
  chains,
  projectId,
  metadata
})

// Create modal
createWeb3Modal({ wagmiConfig, projectId, chains})

// Export component
export default function Web3Modal({ children }) {
  return (
    <WagmiProvider config={wagmiConfig}>
      <QueryClientProvider client={queryClient}>{children}</QueryClientProvider>
    </WagmiProvider>
  )
}
Now, we can use the Web3Modal component in our app. First, notice that we need to wrap the part of the app into it using the wagmi hooks. In this case, we are wrapping it fully into it:
function App() {
  ...

  return (
    <div className="App">
      <Web3Modal>
        <header className="App-header">
          ...
        </header>
      </Web3Modal>
    </div>
  );
}
But we still need to display the popup. How can we do it?
Display Web3Modal
To open the wallets popup, let's use the useWeb3Modal hook inside the App component, to be more specific – the open function it provides.
We also need to edit a bit our old openWidget function to accept the onComplete argument and pass there the open function:
import { useWeb3Modal } from '@web3modal/wagmi/react';

const openWidget = (onComplete) => {
  window.openPromo
    ? window.openPromo({ onComplete: onComplete, config: {hideUpdateAppBlock: true} })
    : onComplete()
}

function App() {
  ...

  const { open } = useWeb3Modal()
  return (
    <div className="App">
      <Web3Modal>
        <header className="App-header">
          ...
          <a
            className="App-link"
            href="#"
            onClick={() => openWidget(open)}
          >
            Open Promo
          </a>
          ...
        </header>
      </Web3Modal>
    </div>
  );
}
You can also safely remove the openWeb3Modal function we previously had with just a placeholder alert.
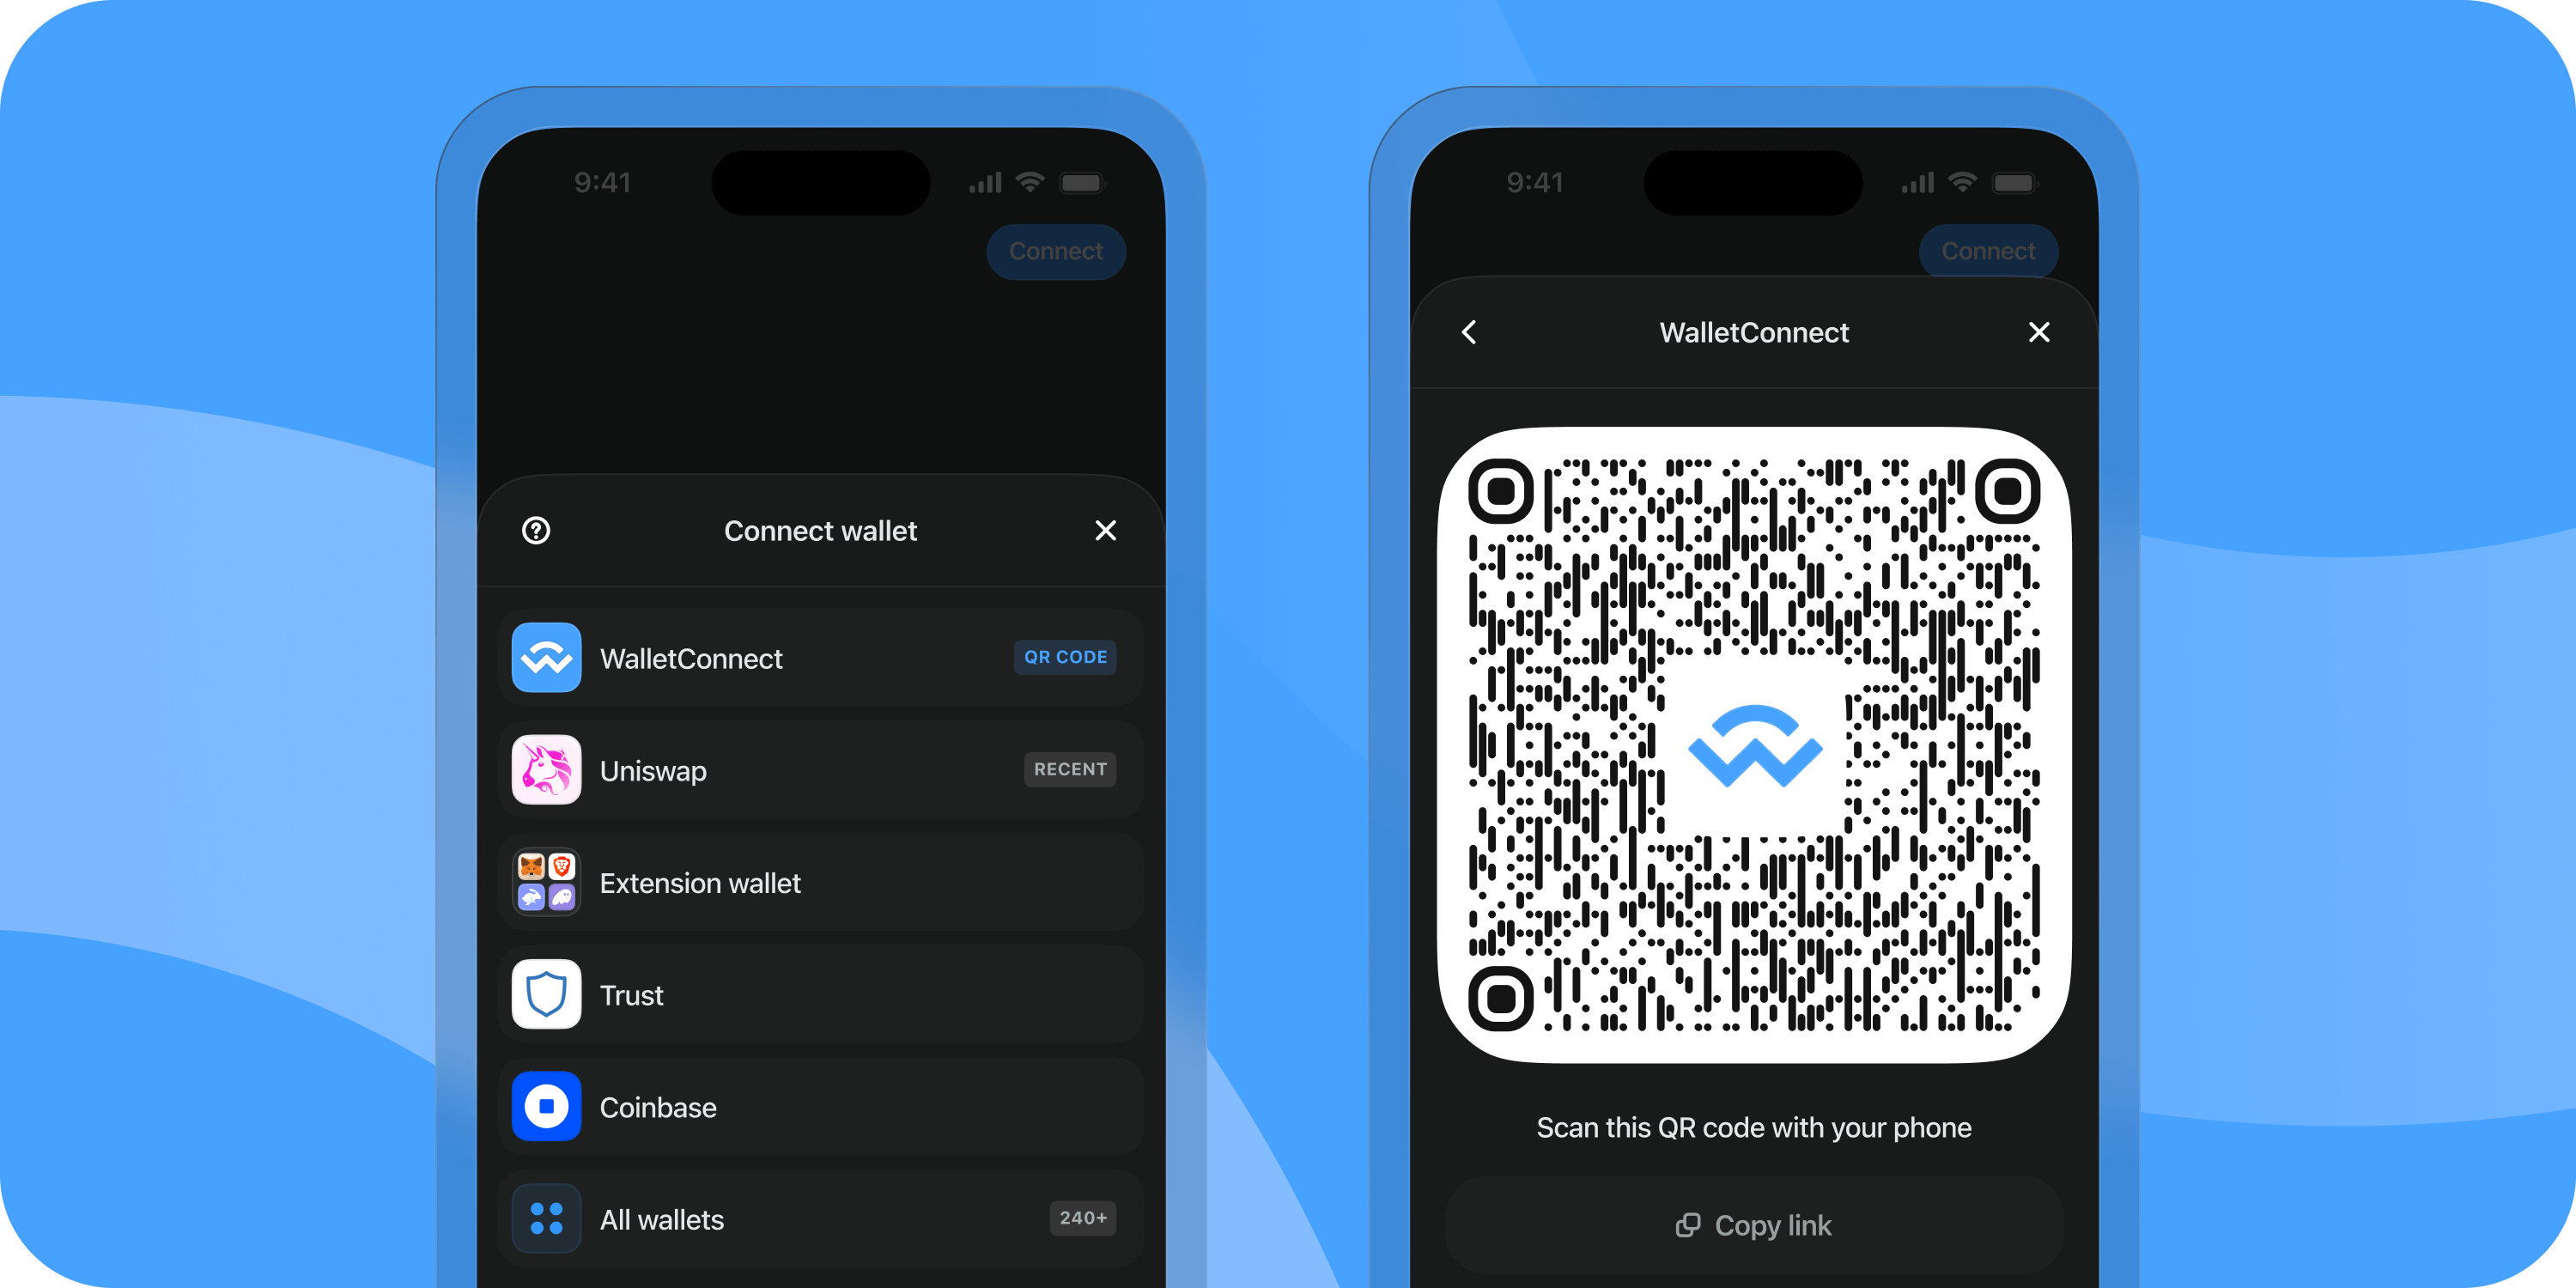
If you go into your App now, you will be able to see the WalletConnect popup appearing after you click the 'Skip' button in the AuroraPass widget:

But it will still need to contain the AuroraPass. Let's add it there.
Add AuroraPass to your wallet list
You can read more about the different options on how to add the Aurora Pass to your Web3Modal here.
We have Web3Modal v3 in our case, so let's use includeWalletIds and modify the Web3Modal.js file:
let options = {
    defaultChain: aurora, // we can set it to make sure we are using Aurora mainnet by default
    includeWalletIds: [
        'c57ca95b47569778a828d19178114f4db188b89b763c899ba0be274e97267d96', //Metamask
        '76260019aec5a3c44dd2421bf78e80f71a6c090d932c413a287193ed79450694', //AuroraPass
    ]};

// pass the 'options' here as the last argument
createWeb3Modal({ wagmiConfig, projectId, chains, ...options})
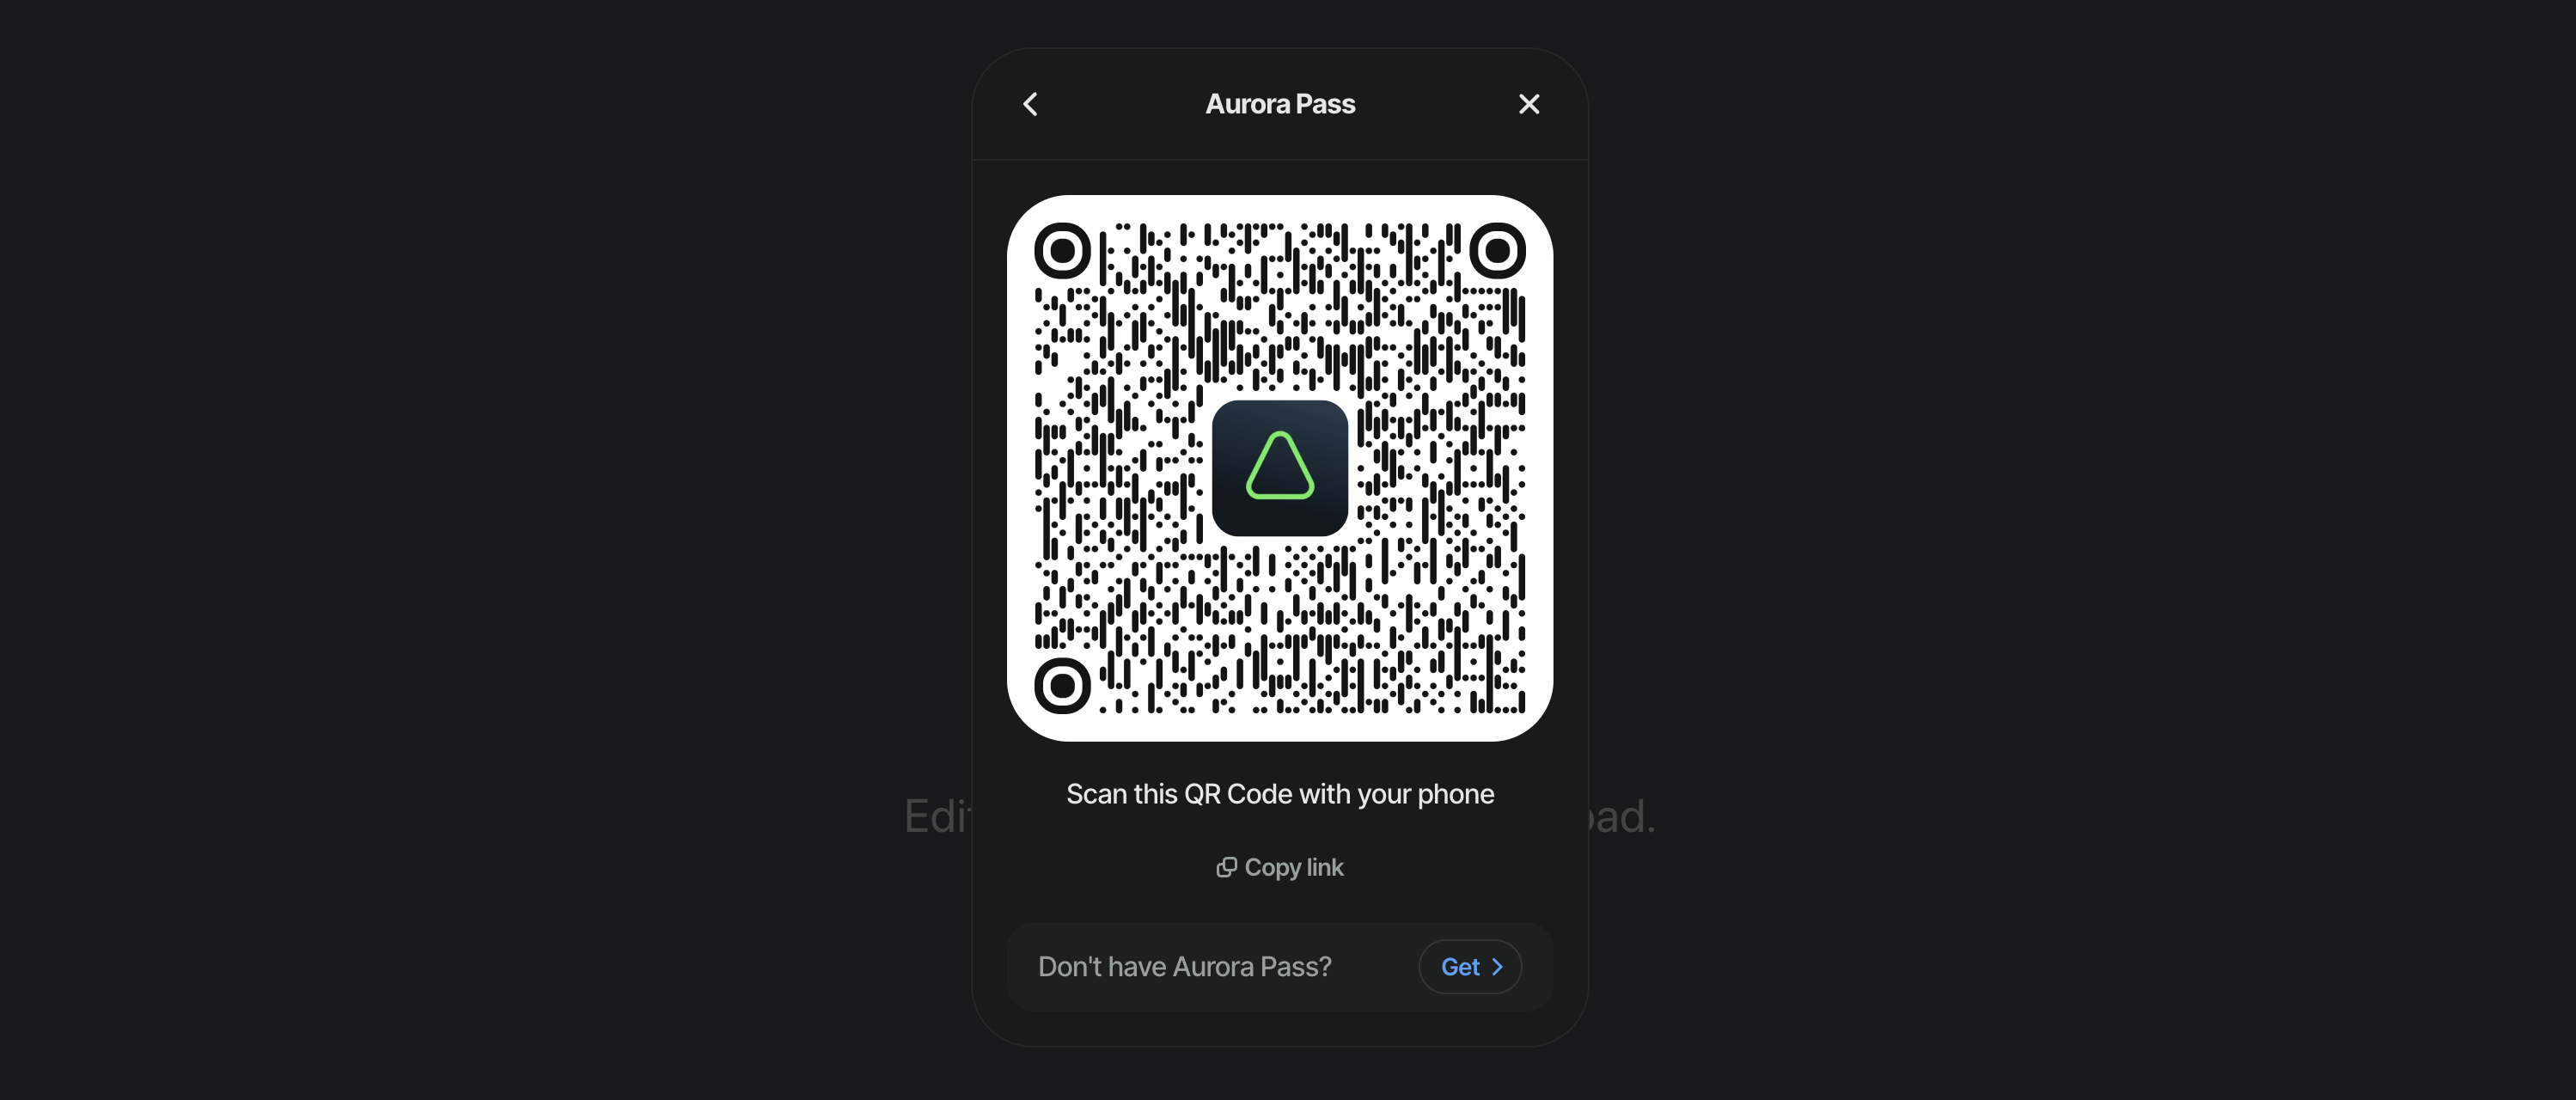
If we re-open the Web3Modal now, we will see the AuroraPass wallet there:

Now, we can try connecting our wallet via the QR code:
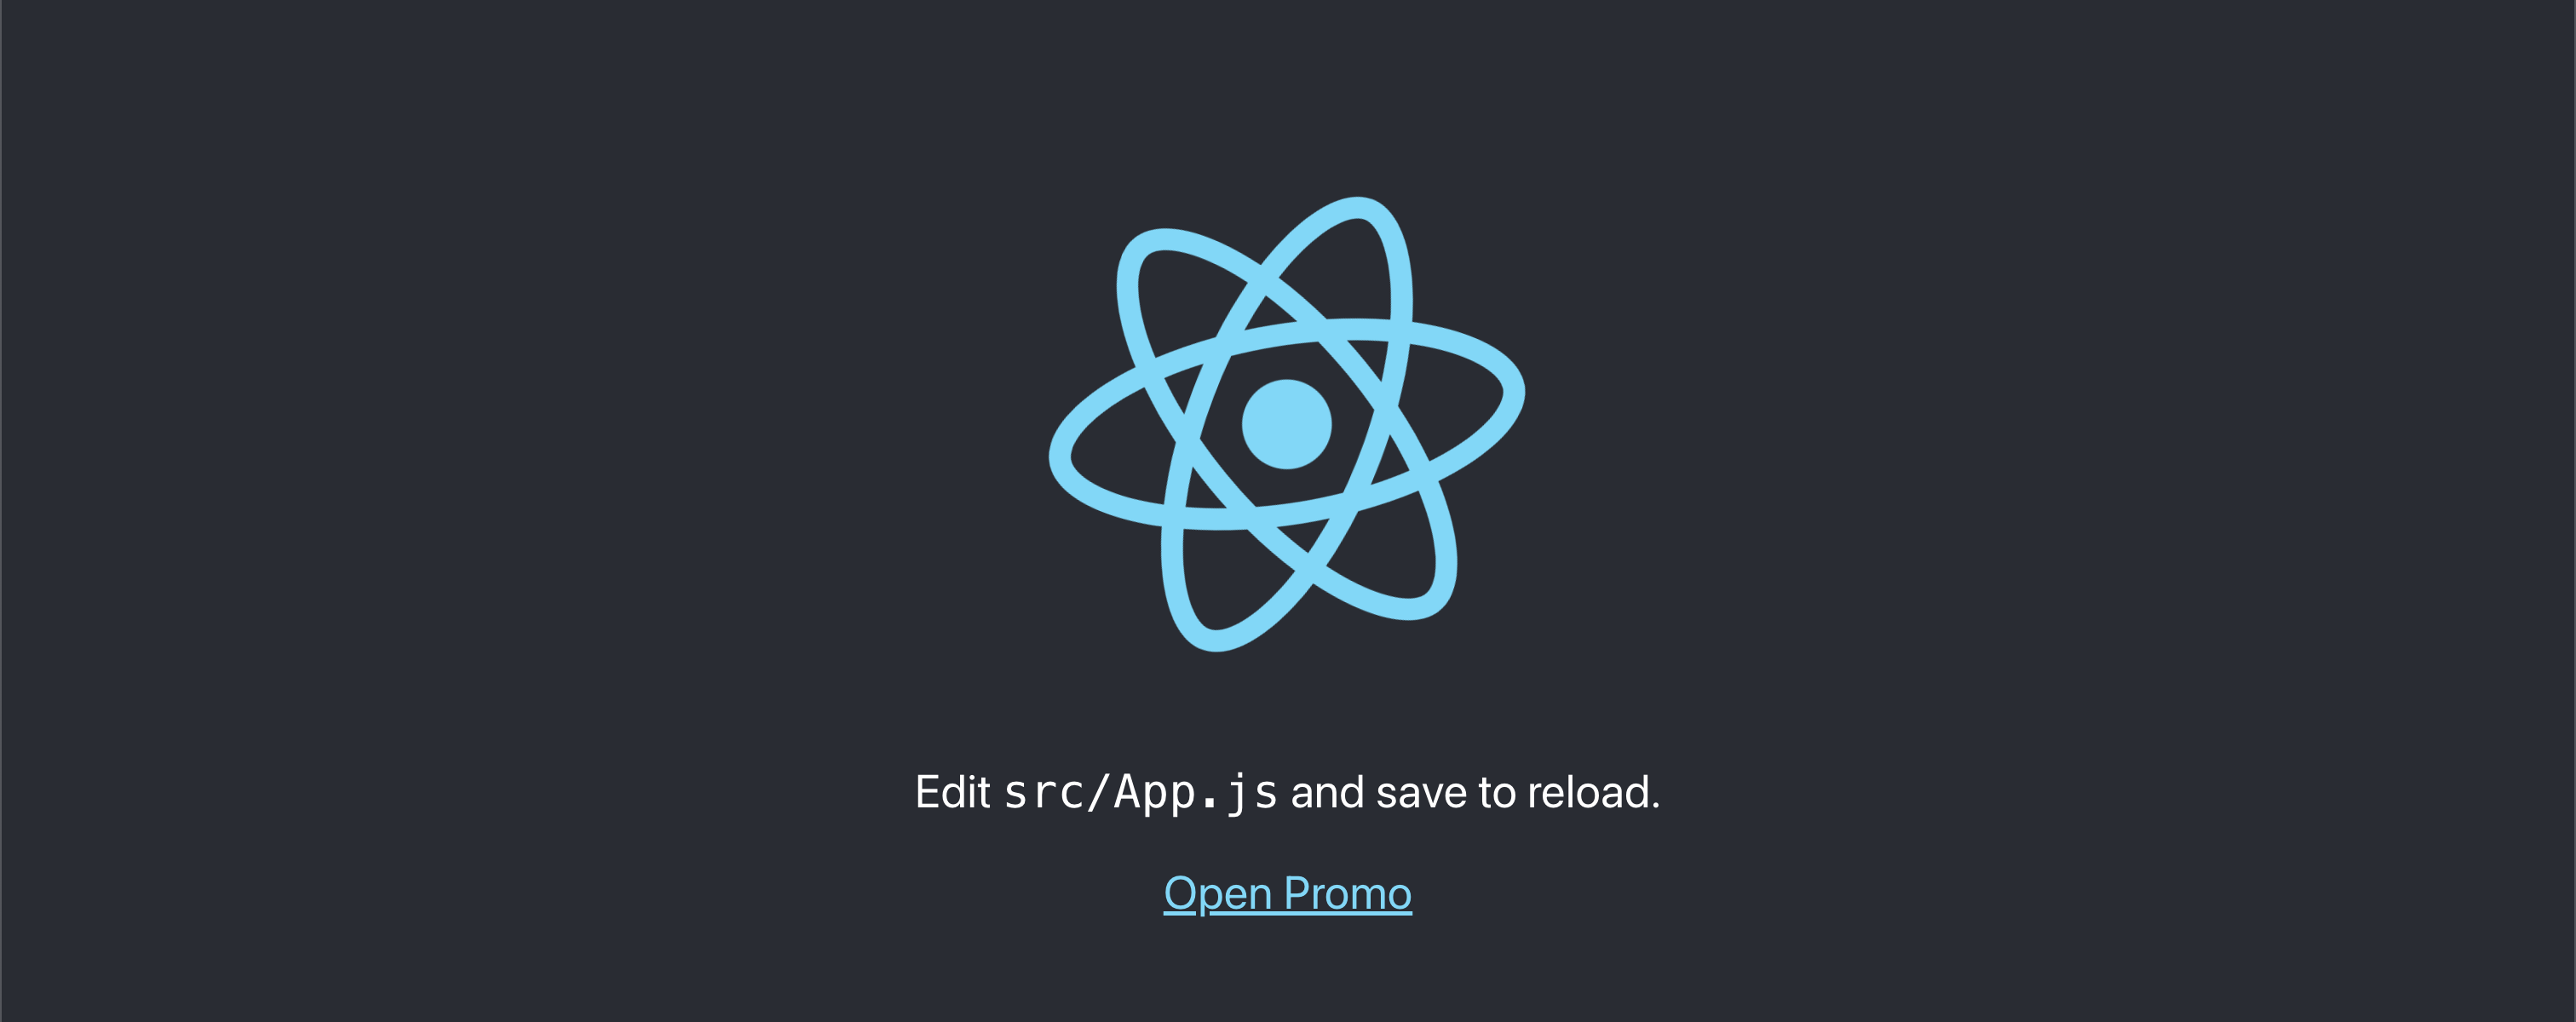
But we won't see if the connection was successful yet because we need something to display that. The popup will close, and we will see the App's initial screen:
Display the connection status in DApp
Let's fix it by replacing the 'Edit src/App.js and save to reload' label with a simple Account component showing us if we have connected to the DApp already.
We can do that inside the App component file right away by using useAccount wagmi hook:
...
import { useAccount } from 'wagmi'
...

function Account () {
  const { address, isConnecting, isDisconnected } = useAccount();
  if (isConnecting) return <div>Connecting...</div>
  if (isDisconnected) return <div>Disconnected</div>
  return <div>{address}</div>
}

function App() {
   ...
   return (
    <div className="App">
      <Web3Modal>
        <header className="App-header">
          ...
          <!-- We have removed a paragraph here and placed the Account component below>
          <Account/>
           <!-- And also renamed the 'Open Widget' button to 'Connect' one>
          <a ...> Connect </a>
          ...
        </header>
      </Web3Modal>
    </div>
  );
}
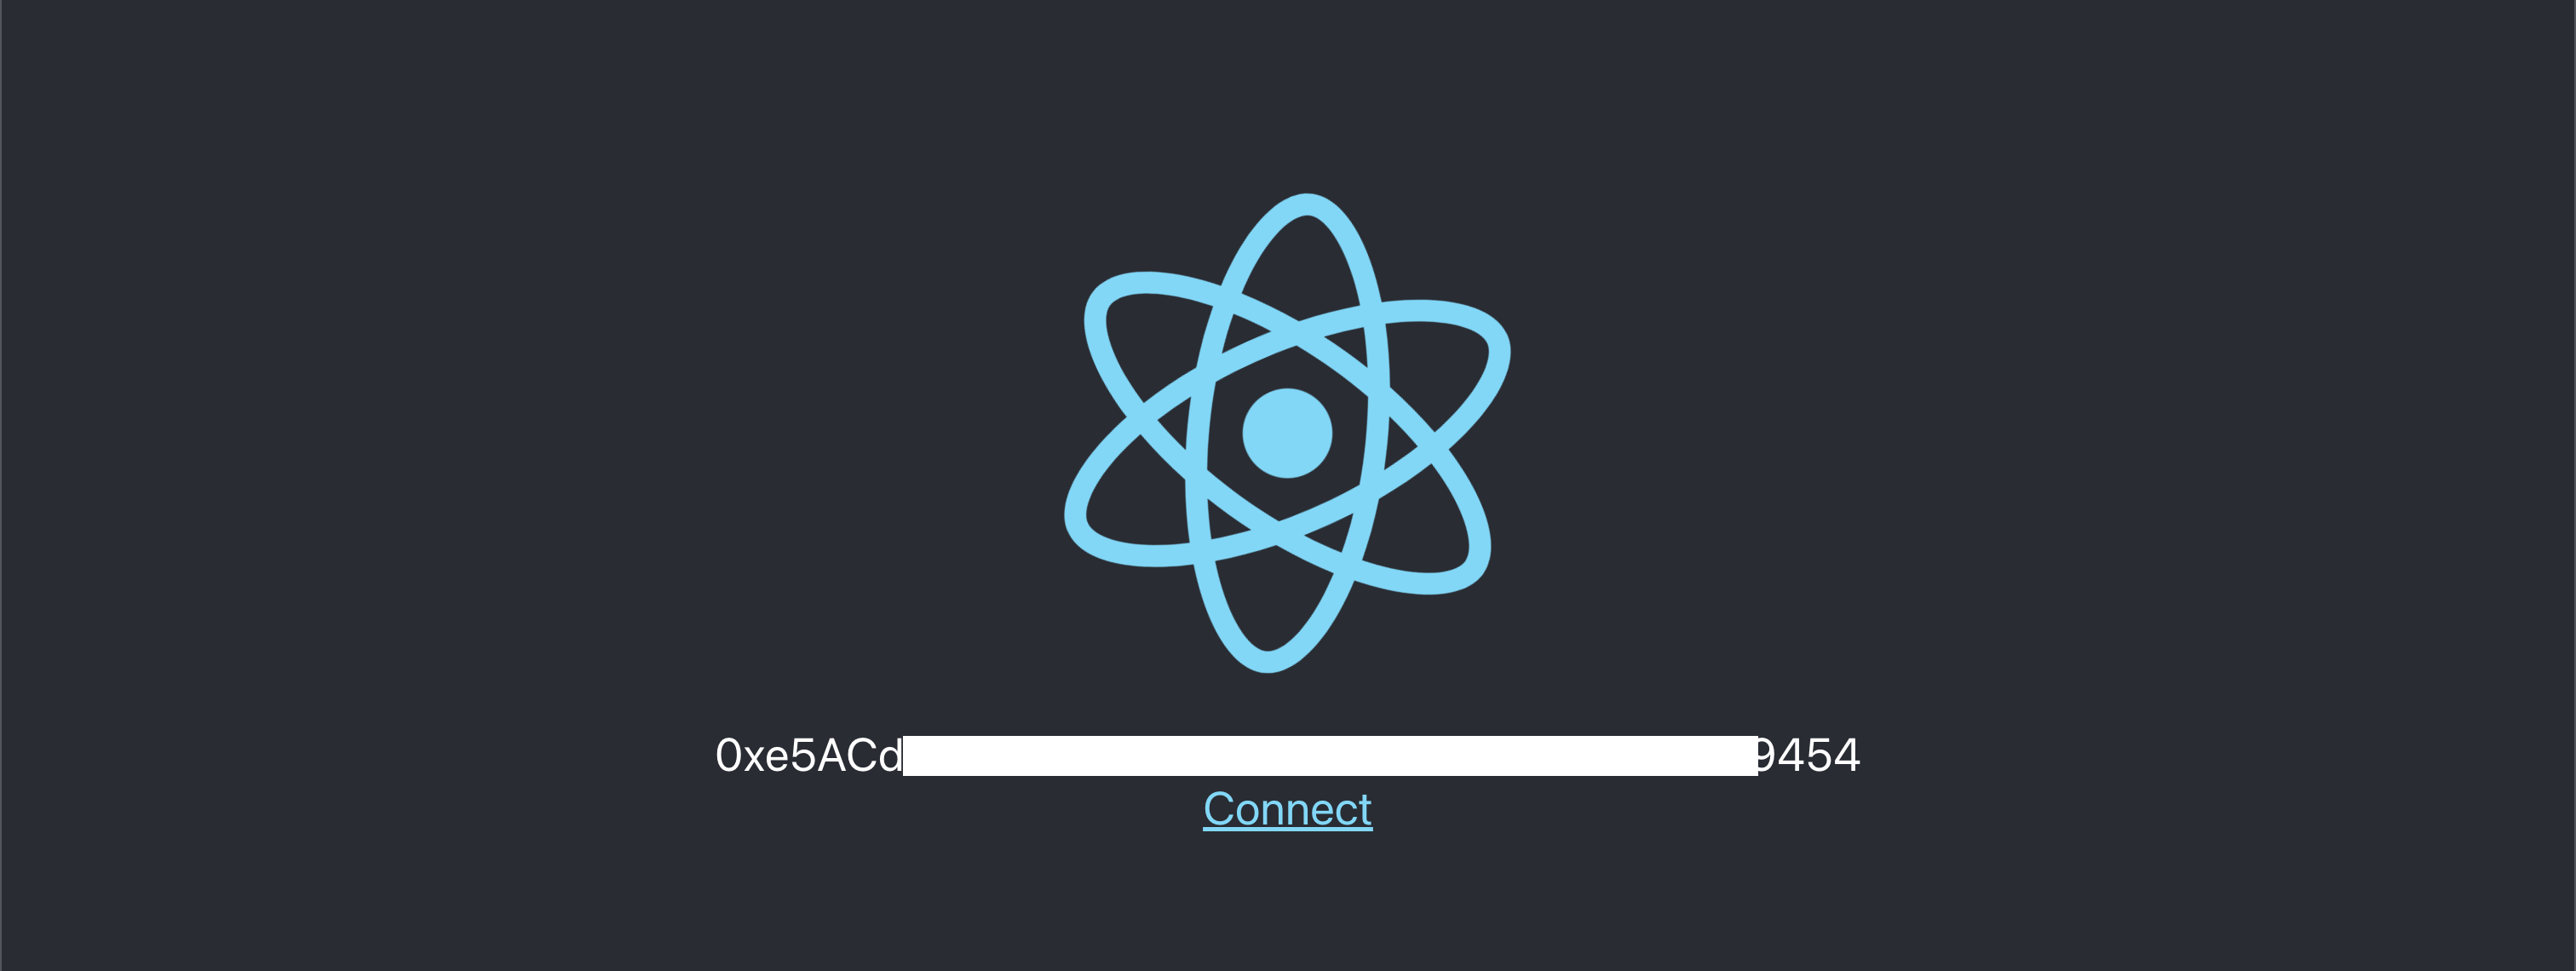
Now we're able to see the status of our connection on the main screen:

And the corresponding account after we've connected via the Web3Modal to the DApp:
Congratulations on completing your AuroraPass integration using Web3Modal!
Troubleshooting
Please, take a look at our Troubleshooting Page. In case you still have questions, please get in touch with our Support Team on Discord and open a support ticket there.